Social Media Presence with Buffer helps individuals and businesses schedule and publish posts on various social media platforms. It allows users to plan their content in advance, ensuring a consistent and well-managed online presence. Buffer supports popular social media platforms like Facebook, Twitter, Instagram, LinkedIn, and Pinterest. One of Buffer’s key features is its scheduling tool, which lets users plan and automate their posts. This helps save time and ensures that content is shared at optimal times for maximum visibility. Users can create a posting schedule and add content to their queue, and Buffer will automatically publish the posts at the specified times.
Get A Free Estimate on Website DesignA Beginner’s Guide to Using Buffer Effectively
In this beginner’s guide, you’ll embark on a journey to harness the power of Buffer for effective social media management. Buffer provides a straightforward platform for scheduling and publishing your social media content seamlessly. Learn the ropes of setting up your account, connecting your social media profiles, and establishing a posting schedule that aligns with your audience’s peak engagement times. Using Buffer is quite easy! Here’s a simple guide:
Create an Account
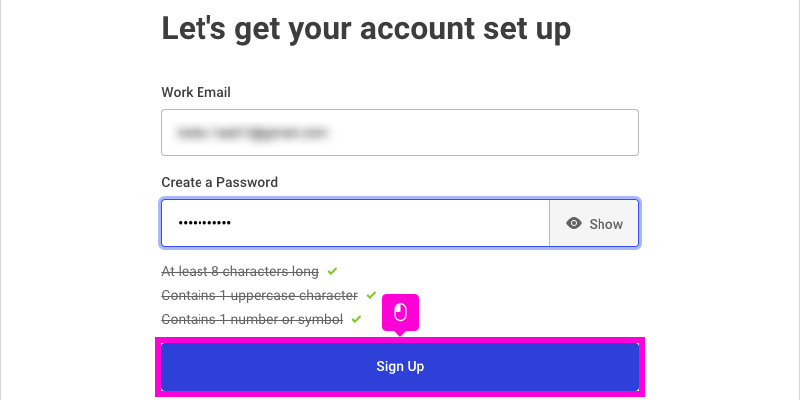
To create a Buffer account, you typically need to visit the Buffer website and look for a “Sign Up” or “Create Account” button. Click on that, and you’ll be asked to provide some basic information like your email address and create a password. Once you’ve entered the required details, follow any additional prompts to set up your account. This might include choosing a username or connecting your social media profiles.
Connect Your Social Media Accounts
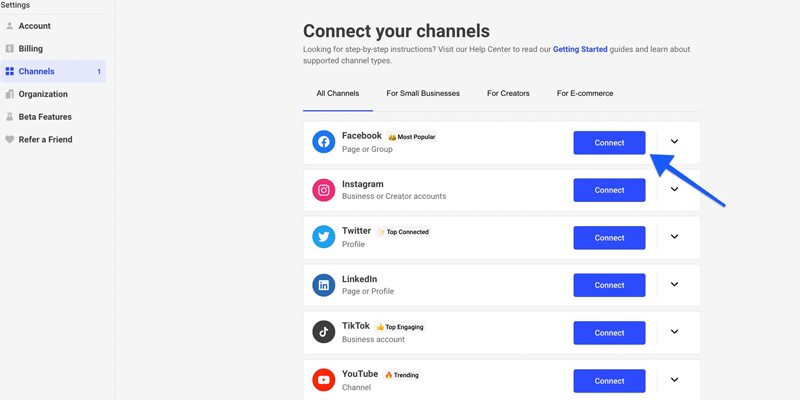
Connecting your social media accounts on a platform like Buffer is a straightforward process. After creating your account, look for an option like “Connect Accounts” or “Add Social Media.” Click on this option, and you’ll typically see a list of popular social media platforms such as Facebook, Twitter, Instagram, LinkedIn, etc.
Select the social media accounts you want to connect to Buffer, and then follow the prompts to authorize Buffer’s access. This usually involves logging in to your social media accounts and granting the necessary permissions. Once connected, you’ll be able to manage and schedule posts for those accounts directly from the Buffer platform.
Set Up Posting Schedule
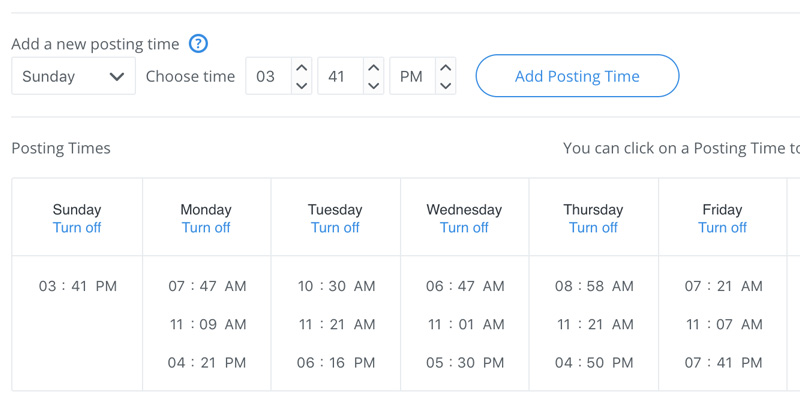
Setting up a posting schedule on Buffer is a simple process to ensure your social media content gets shared at optimal times. After connecting your social media accounts, navigate to the scheduling section. Look for an option like “Posting Schedule” or “Schedule Posts.”In this section, you can choose specific days and times for your posts to go out. Buffer may also offer features like automatic scheduling, which suggests the best times based on your audience’s engagement patterns. Adjust the settings according to your preferences and the times when your audience is most active.
Add Content to Your Queue
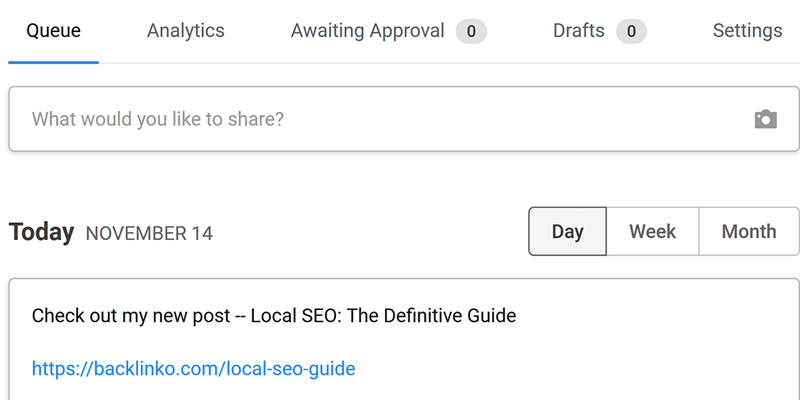
Adding content to your Buffer queue is a simple way to schedule posts for your social media accounts. After connecting your social media profiles and setting up your posting schedule, look for an option like “Add to Queue” or “Create Post” within the Buffer platform.
When you find or create a post you’d like to share, select the social media accounts you want it to go to and choose the “Add to Queue” option. Buffer will automatically schedule the post for the next available time slot in your predetermined posting schedule.
Review and Edit Queued Posts
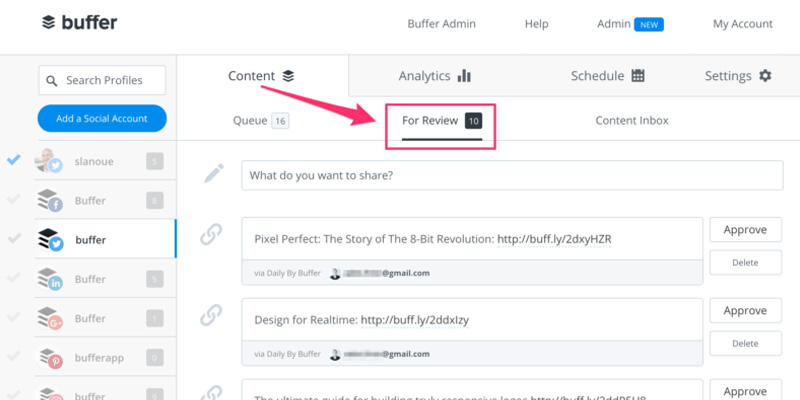
Reviewing and editing queued posts in Buffer is an essential step to ensure your scheduled content aligns with your strategy. After adding posts to your queue, navigate to the “Queue” or “Scheduled Posts” section in Buffer. Here, you’ll find a list of your upcoming posts. Review the content, captions, and scheduled times for each post. If you need to make changes, look for options like “Edit” or “Modify.” You can adjust the post’s content, update the scheduled time, or make any necessary modifications. This feature allows you to maintain control over your content calendar, making last-minute adjustments as needed. After reviewing and editing, your changes will be reflected in the upcoming schedule.
Use the Browser Extension
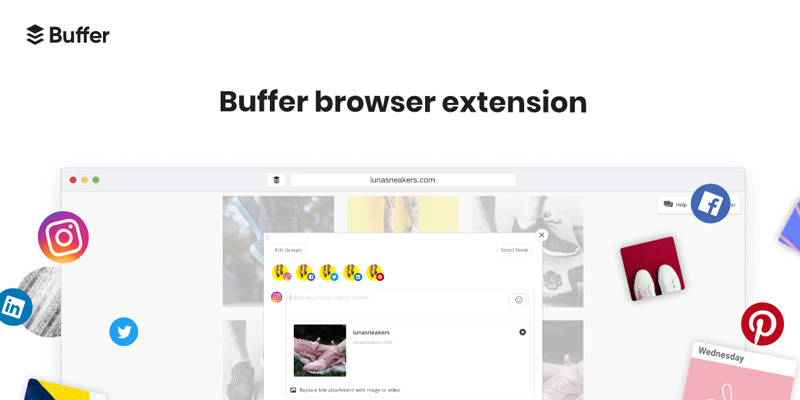
Utilizing the Buffer browser extension is a convenient way to streamline content sharing from the web. After installing the browser extension, usually available for popular browsers like Chrome or Firefox, look for the Buffer icon in your browser’s toolbar.
When you come across an article, image, or webpage you want to share, click on the Buffer icon. A pop-up window will appear, allowing you to customize your post, select the social media accounts, and add it to your Buffer queue. This extension makes it easy to share content directly from the web without having to visit the Buffer platform separately.
Check Analytics
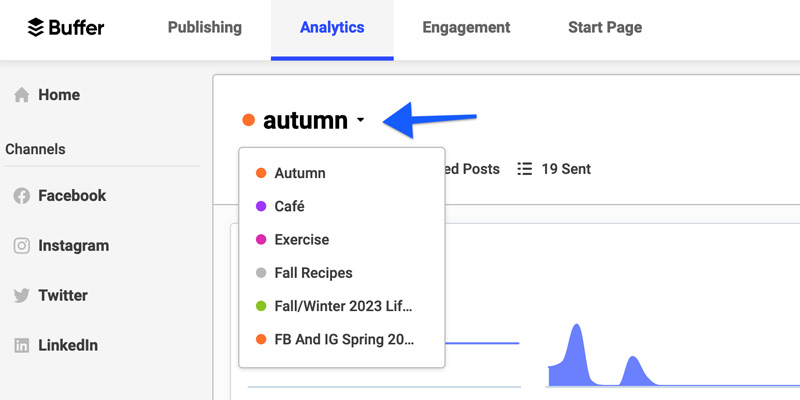
Checking analytics in Buffer provides valuable insights into the performance of your social media posts. Navigate to the “Analytics” or “Insights” section in the Buffer platform. Here, you’ll find data on key metrics like engagement, clicks, likes, and shares.
Explore Other features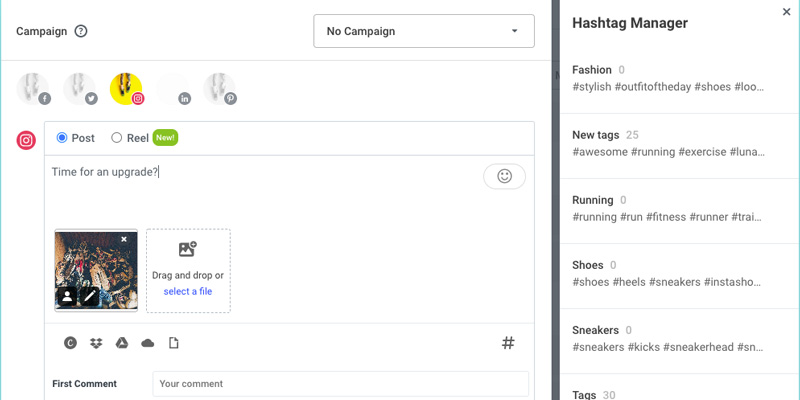
Exploring other features in Buffer allows you to make the most of the platform’s capabilities. Aside from the core functionalities like scheduling and analytics, Buffer may offer additional features such as direct scheduling, image and video uploads, team collaboration tools, and more.
To explore these features, navigate through the Buffer dashboard and look for sections like “Features” or “Tools.” Experiment with options that align with your social media management needs. For example, direct scheduling allows you to set specific dates and times for posts, while team collaboration tools enable coordination among multiple users.
Get A Free Estimate on Website DesignBuffer’s Free Social Media Account Allowance
In the free version of Buffer, you’re allowed to link and handle up to three social media accounts. This implies that you can connect platforms such as Facebook, Twitter, or Instagram without incurring any charges. This feature is particularly beneficial for individuals or small businesses aiming to establish and manage a presence across various social networks without the need to upgrade to a paid subscription.
By being able to link three accounts, users have the flexibility to engage with their audience on different platforms simultaneously. For instance, you might connect your Facebook, Twitter, and Instagram accounts to streamline your social media efforts. This allows for a well-rounded approach to sharing content and interacting with followers without the limitations of a single platform.
Get A Free Estimate on Website DesignBuffer’s Pricing Plans
Diving into Buffer’s paid plans opens up a world of possibilities for managing your social media presence. With the premium subscription, you’re no longer restricted to just three social media accounts. You can connect and handle an unlimited number of platforms, allowing for a more extensive and diverse online outreach. This is especially beneficial for businesses or individuals with a broader social media footprint, providing the flexibility to engage with audiences across various platforms seamlessly.
Moreover, Buffer’s paid plans come with additional features to enhance your social media strategy. Advanced analytics tools provide deeper insights into the performance of your posts, helping you understand what resonates best with your audience.
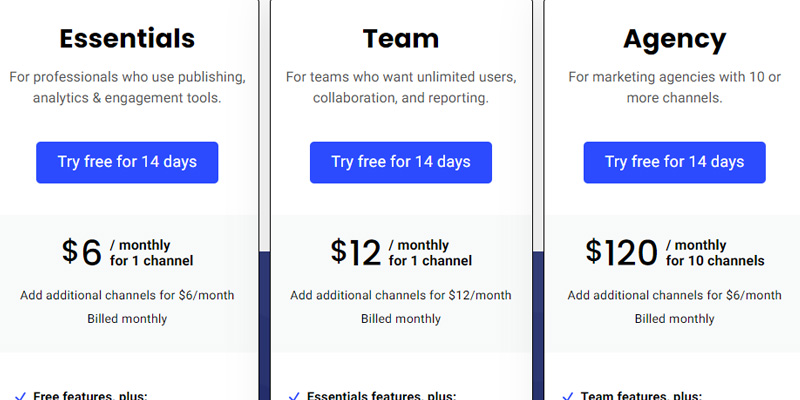
Buffer offers different pricing plans to fit various needs. The plans determine what features you get and how much you pay. There is a free version that lets you connect three social media accounts. If you need more, you can check out the paid plans. Buffer has different pricing plans to choose from based on your needs. Here’s a simple breakdown:
Essentials
This plan costs $6 each month, and you can connect and manage content for one social media channel. It’s a good choice if you’re an individual or a small business focusing on essential social media management.
Team
Priced at $12 per month, the Team plan is for working together. It allows you to connect and manage content for one social media channel, making it suitable for small teams or businesses that need to coordinate their social media efforts.
Agency
The Agency plan is more extensive, costing $120 per month. With this plan, you can connect and manage content for up to 10 social media channels. It’s a great fit for larger businesses, marketing agencies, or individuals handling multiple online presences.
Get A Free Estimate on Website DesignA Balanced Analysis of its Pros and Cons

Buffer comes with notable advantages and some considerations to keep in mind. On the positive side, it excels in simplifying social media management through easy scheduling and a user-friendly interface, making it accessible for users of all levels. The content queue ensures a consistent posting schedule, and basic analytics provide insights into post performance. Additionally, the browser extension facilitates seamless content sharing. However, limitations include a restricted free version, where advanced features like in-depth analytics and direct Instagram posting require a paid upgrade. Despite these considerations, Buffer remains a popular choice for those seeking efficient social media scheduling and management.
Pros of Buffer
Buffer is great for managing social media. It’s easy to use, and both beginners and experienced users like it. You can plan and organize your posts easily, thanks to its simple scheduling process. The content queue feature helps you stick to a consistent posting schedule, making your online presence more strategic. Even though the analytics tools are basic in the free version, they still give you useful insights into how your posts are doing, so you know what your audience likes.
Cons of Buffer
Buffer has some things to keep in mind. The free version has limits, like the number of social media accounts you can connect and basic analytics. To get more features, you need to pay, which might be a problem if you’re on a tight budget. Another thing is the free version can’t directly post on Instagram, so you have to do it manually using mobile notifications. While Buffer is generally easy to use, new users might find it a bit tricky at first.
Get A Free Estimate on Website DesignSocial Media Marketing with our Software House

Embarking on a journey of social media marketing collaboration with our software house promises to enhance and refine your digital strategy. Our team, equipped with expertise in the dynamic world of social media, is committed to elevating your online presence. By joining forces, we bring tailored solutions, innovative approaches, and a wealth of experience to the table. Whether you’re a business seeking broader visibility or an individual aiming for digital prominence, this collaboration is designed to empower you on your path to social media success.
Navigating Social Media Growth Hand-in-Hand
In the quest for social media growth, partnering with our software house opens up a world of possibilities. We go beyond conventional solutions, offering a comprehensive toolkit for your digital journey. From crafting compelling content to implementing data-driven strategies, our collaboration is centered on your success.






 i am Ahsan.
Leave a Reply